Showing posts with label Bedrooms. Show all posts

4/2/16

April Challenge: Organizing & Cleaning Bedrooms

Hello! 

So, tell me, are you still doing the Monthly Organizing Challenge?

We're into April now, which means its time to organize and clean those bedrooms.  Are you ready?

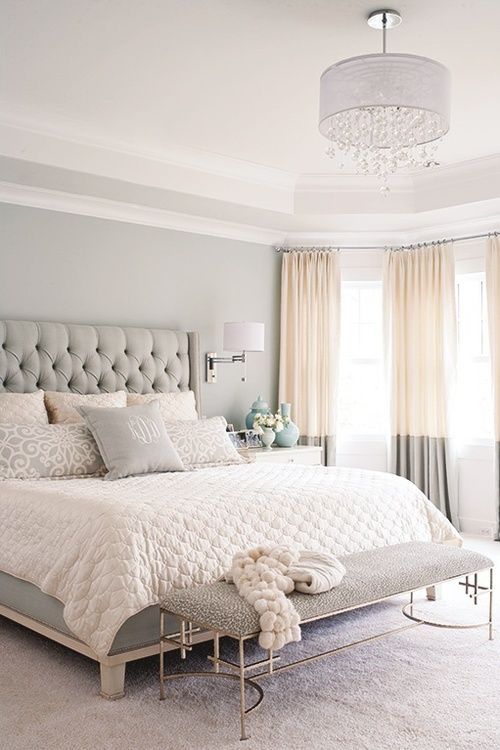
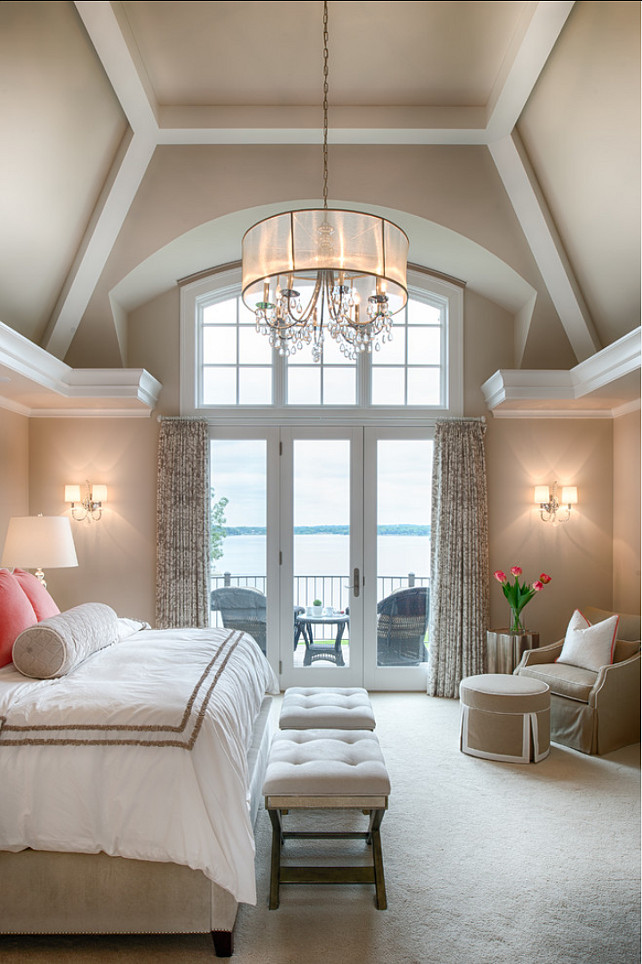
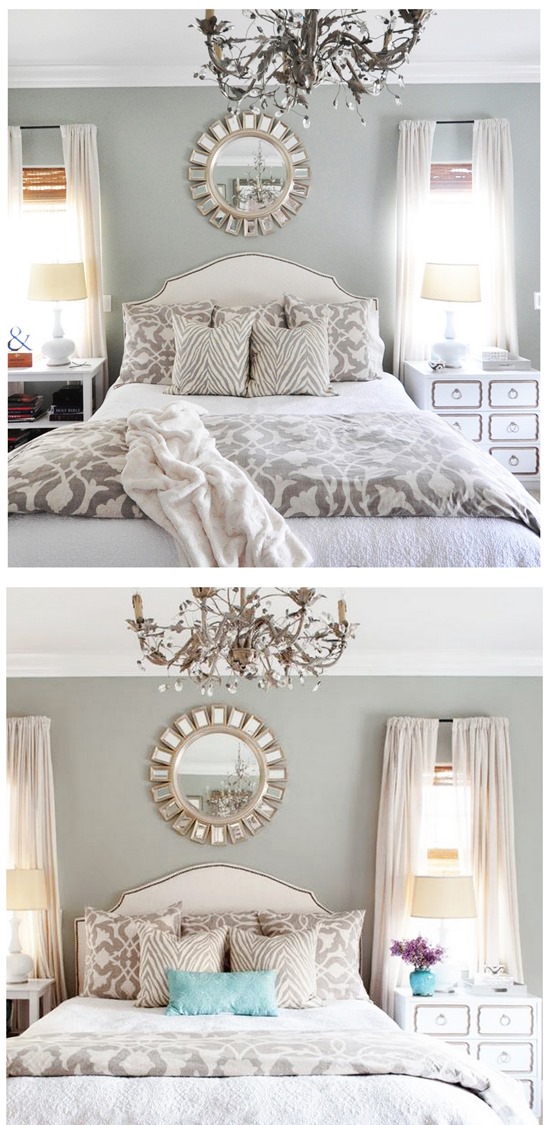
source list for photo's above 1  2  3  4  5


This month I'm challenging you to do the following:

Organize dresser drawers

Organize night stands

Organize closets

Organize toys/ toy storage

Wash light fixtures

Wash bedding

Clean windows & blinds

Wash curtains

Clean baseboards

Shampoo carpets

Below is a little inspiration to get you started. 
Simply click the link under the photo to be directed to the blog post.


Here's your free printable checklist:

(simply click on the photo above and click print)

Okay, ready set, go organize and clean those bedrooms.

This post is part of the Monthly Organization Challenge. You can join the challenge at any time. Go HERE to see all the posts and bring Delightful Order to your home and life this year.

To stay connected, you can sign up to receive emails when new posts are published or follow along on Instagram or Facebook. (Please note that Facebook has made some changes, and you may or may not see all the posts there.)  I also have a Monthly Organization Challenge board set up on Pinterest, so you can follow along there as well. 


May you be a little inspired!
Until next time,
DaNita 
 . . . . . . . . . . . . . . . . . . . . . . . . . . . . . . . . . . . . . . . . . . . . . . . . . .

View more of my Most Recent Projects HERE.
 

11/5/15

DIY: Beaded Light Fixture (Contributor Post)

When decorating my young daughter’s bedroom, I knew I wanted a fun light fixture to really tie everything together. The criteria? Nothing sparkly and small, in both price and size. I fell in love with this light from Restoration Hardware months ago and couldn’t get it out of my head, even though there was no way I was spending $300+ on a kid’s fixture.
(Source)

I searched for wooden beads to make it myself for the longest time and finally found some at Michael’s. I grabbed a bunch ($40 worth) in various sizes and hoped for the best, knowing full well that it could very likely be a “nailed it” moment (if you’re on Pinterest then you know what I mean). This is what I started with:


I went into this blindly, haphazardly stringing beads onto fishing line and tying them onto the plastic dome that was in her bedroom since we purchased the house. About halfway through, I began to doubt that it would even stay on the ceiling…I never took into account the weight of all of the beads! Thankfully, it wasn’t too heavy but unfortunately, I tied the strings too tight and they didn’t drape ‘just so’. So, I painstakingly re-beaded each strand and started again. Learn from my mistakes and do a few test strands before rushing into things. I would also recommend using a thin wire instead of fishing line to make it more heat resistant.


I picked up some leather lace (also from Michael’s) and crafted a tassel to attach to the bottom. A little white spray paint on the base and I was done!


I love the final product and I'm already scheming up other fixtures for our house. Let us know if you give it a shot!

Ashley


"Hello, I'm Ashley from Three Wooden Spoons, a blog featuring my adventures in the kitchen and following our renovation of a 1940's farmhouse in Minnesota. I love to cook and bake, write, explore thrift and antiques stores, drink strong coffee, and dabble in home design. I would describe my style as simple and classic, but also eclectic. I love finding second-hand furniture and home decor, as well as antiques from various eras, and making it all come together for a cohesive interior."

10/18/15

Master Bedroom Inspiration

As I mentioned earlier, I'm in the process of re-decorating my master bedroom.  I shared the before photo's in this post here.

While dreaming of re-doing a room, I do a lot of online research, looking for inspiration.

I'm looking to create a crisp, clean, bright and relaxing space.

Today, I wanted to share some spaces that have inspired me.  I'm hoping to take little bits and pieces from the photo's below and bring some of those same ideas into my own master bedroom.

(source)

(source)

(source)

(source)


(source)

(source)

(source)

(source)

(source)

Aren't they all so pretty?  I'm super excited to get my own room finished and hopefully looking a little like some of these rooms.


Check back soon to see some of my own master bedroom progress.

Follow me on Instagram and Facebook to stay updated on my latest DIY projects, shop items, organizing and decorating ideas, craft, party and holiday ideas and so much more.


May you be a little inspired!
Until next time,
DaNita 
 . . . . . . . . . . . . . . . . . . . . . . . . . . . . . . . . . . . . . . . . . . . . . . . . . .

View more of my Most Recent Projects HERE.
 

10/10/15

Master Bedroom Before

I've been wanting to re-do my master bedroom for years.

This week I finally just started and stopped dreaming about it.

Here are the before pictures:


I've been painting like crazy! I'm going light and bright!  Wait till you see the after!


May you be a little inspired!
Until next time,
DaNita 
 . . . . . . . . . . . . . . . . . . . . . . . . . . . . . . . . . . . . . . . . . . . . . . . . . .

View more of my Most Recent Projects HERE.
 

2/11/14

My Boys' Shared "Nautical" Bedroom

As most of you know I have 4 boys (and in 3 weeks, I will have 5 boys!!)

With that 5th boy coming soon, I've recently been moving rooms around to make room for a nursery again. (The nursery is almost done and it's so cute!  I'm hoping to finish it up and show you before my little guy arrives, but we will have to see.  I'm not making any promises ;)  I've got LOTS of projects that I'd like to finish before he comes, so we shall see.)

Today I'm showing you my youngest boys shared Nautical room.  It's a work in progress room.  I really haven't finished it yet, but I'm going to show it to you anyway.

Someday I'd like to change the red and white striped shams to blue chevron stripe or blue trellis design shams. I'd like those gold pillows to be red with a large white letter momogram on each. I'd also like to get two trunk type toy boxes to go at the foot of each bed.  Wouldn't that be so cute?

Some of you may think I'm crazy to have cream bedding coverlets in a boys room, but I will tell you this... you can bleach whites/creams and I have many times.  We've had the cream bedding for many, many years and I will say, they still look fine and are in pretty good condition.

I'd still love to paint the room someday too and I think I'll paint the ceiling too (or at least part of it) as there is just too much ceiling in here with the slant.

This room is actually more of a big bonus room, but I have to use it as a bedroom as we don't have enough bedrooms not to.

The "old" toy room is through that walkway.  I showed you the toy room tour the other week (which isn't the toy room anymore.) That room is now my second oldest sons room. I'm still waiting on a door for his room too.

 The lighthouse poster is from Costco.  I still need to add a matte to that piece.

 A little desk area and ...

...across from the beds, I had created a reading nook.  (Which doesn't even look like this anymore) Now I've moved all the toys to this section of the room.

.. oh and those curtains... they're pinned up there.  That's another "project" that I need to finish.  All I need to do is sew a pocket for the rod to go through, but I have yet to do it.  (Believe me I have lots and lots of this kind of thing going on in my house - curtains that are pinned up and yet to be sewn.)  If only my mom lived closer!  She's great on the sewing machine, me not so much.
The bean bags are from Target, the rug and curtains are from Ikea.
 and these picture ledges are the RIBBA picture ledges from Ikea.  I just used them for books instead and I do love them!  The link directs you to the smaller ones, but I have the bigger ones here.
I did love this area as a reading nook, but after moving the Skateboard bedroom to the toy room, I needed a "new home" for all of those toys, so now this space looks like this:
 
 I moved the bookcases that shelves the toys into this area.
 and it's been working great.
The top baskets hold books now...
... and I did LOVE those ledges with the books, so I moved three of them on a wall next to the beds.
and that is the tour of my boys' shared bedroom.

May you be a little inspired!
Until next time,
DaNita 
 . . . . . . . . . . . . . . . . . . . . . . . . . . . . . . . . . . . . . . . . . . . . . . . . . .

View more of my Most Recent Projects HERE.
 

Graduation Party with Printables

Hi all! My son graduated last week.  Today, I am sharing his graduation party decor with you. I have a bunch of printable graduation deco...

Home Tour

Project Gallery

Search This Blog